 Kubernetes on Azure AKS with Azure Database and Blob Storage
Deploy Kestra to Azure AKS with Azure Database for PostgreSQL as the database backend and Blob Storage as the internal storage backend.
Overview
This guide provides detailed instructions for deploying Kestra to Azure Kubernetes Service (AKS) with Azure Database for PostgreSQL servers as database backend and Blob Storage for internal storage.
Prerequisites:
- Basic command-line interface (CLI) skills
- Familiarity with Azure AKS, PostgreSQL, Blob Storage, and Kubernetes
Launch an AKS Cluster
First, log in to Azure using az login.
Run the following command to create an AKS cluster named my-kestra-cluster:
az aks create \
  --resource-group <resource-group> \
  --name my-kestra-cluster \
  --enable-managed-identity \
  --node-count 1 \
  --generate-ssh-keys
Confirm that the cluster is up.
Run the following command to set your kubecontext to the newly created cluster:
az aks get-credentials --resource-group <resource-group> --name my-kestra-cluster
You can now confirm that your kubecontext points to the AKS cluster using:
kubectl get svc
Install Kestra on Azure AKS
Add the Kestra Helm chart repository and install Kestra:
helm repo add kestra https://helm.kestra.io/
helm install my-kestra kestra/kestra
Launch Azure Database for PostgreSQL servers
This first installation relies on a PostgreSQL database running alongside the Kestra server - on a separate pod.
For a production-grade installation, we recommend a managed database service such as Azure Database for PostgreSQL servers.
Launch a database using Azure Database for PostgreSQL servers
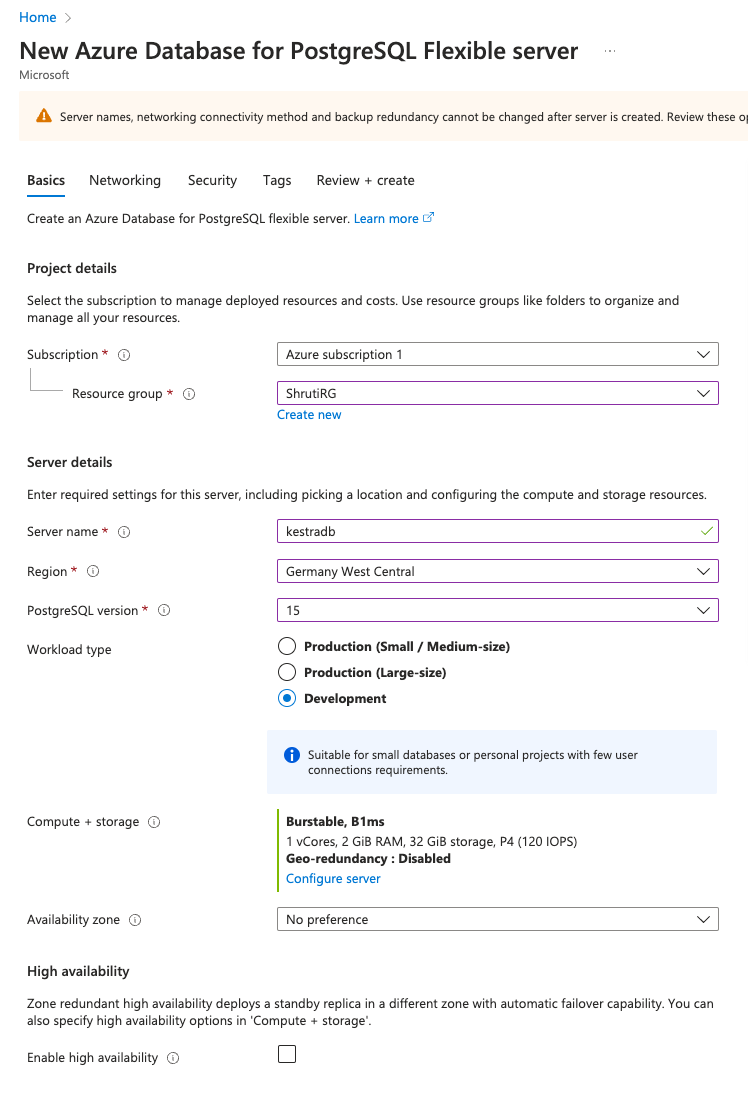
- Go to the Azure Database for PostgreSQL servers.
- Click on Create Azure Database for PostgreSQL server (Kestra also supports MySQL, but PostgreSQL is recommended).
- Choose an appropriate Subscription and Resource Group.
- Put an appropriate Server name and select the preferred Region.
- Choose the latest PostgreSQL version. We recommend version 17.
- Select the Workload type as per your requirement.
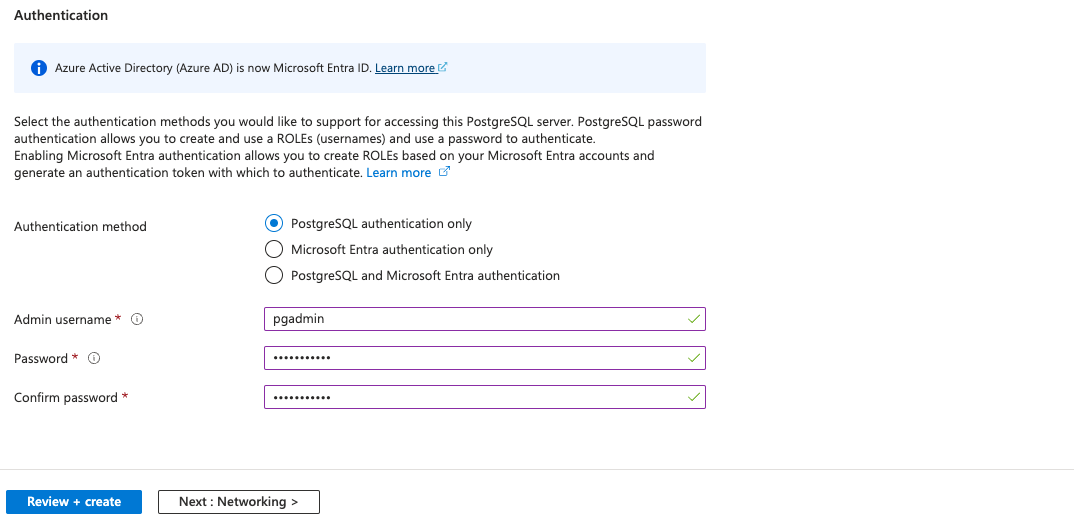
- Choose Authentication method as PostgreSQL authentication only.
- Provide an appropriate Admin username and Password.
- Click on Next: Networking.
- Check the box for Allow public access from any Azure service within Azure to this server.
- Click Review + Create. Review the configurations and click Create.
- Wait for the database to be provisioned.

Create a Kestra database
- Go to the database overview page and click on Databases from the left-side navigation menu.
- Click on Add.
- Put an appropriate database name and click Save at the top.
Update Kestra configuration
Configure Azure Database in the Helm chart's values like in the following example:
configuration:
  kestra:
    queue:
      type: postgres
    repository:
      type: postgres
  datasources:
    postgres:
      url: jdbc:postgresql://<your-db-external-endpoint>:5432/<db_name>
      driverClassName: org.postgresql.Driver
      username: <your-username>
      password: <your-password>
Also, disable the PostgreSQL pod by changing the enabled value in the postgresql section from true to false in the same file.
postgresql:
  enabled: false
In order for the changes to take effect, run the helm upgrade command as:
helm upgrade my-kestra kestra/kestra -f values.yaml
Prepare an Azure Blob Storage container
By default, Minio pod is being used as storage backend. This section guides you on how to change the storage backend to Blob Storage.
- Go to the Storage Accounts.
- Click on Create.
- Choose an appropriate Subscription and Resource Group.
- Put an appropriate Storage account name and select the preferred Region.
- Select Performance and Redundancy as per your requirement.
- Click Review and post reviewing the configurations, click Create.
- Click the newly created storage account.
- On the storage account overview page, click the Containers from the left-side navigation menu.
- Click Create at the top to create a new container.
- Put an appropriate name for the container and click Create. A new container will be created.
- Now, click Access keys from the left-side navigation menu.
- For one of the keys, either key1 or key2, click Show for the Connection string and click the Copy to clipboard button.
- Make a note of the connection string for later use. We will require this for configuring the storage backend.
- Add Blob Storage configuration in the Helm chart's values like in the following example:
configuration:
  kestra:
    storage:
      type: azure
      azure:
        container: "<your-container>"
        endpoint: "https://<your-storage-account>.blob.core.windows.net/"
        connectionString: "<your-connection-string>"
Also, disable the MinIO pod by changing the enabled value in the minio section from true to false in the same file.
minio:
  enabled: false
In order for the changes to take effect, run the helm upgrade command as:
helm upgrade my-kestra kestra/kestra -f values.yaml
Access Kestra UI
Note: You must create an Application Gateway in Azure for creating an ingress controller.
Implement an ingress controller for access. You can install AKS Load Balancer Controller via Helm:
helm install aks-load-balancer-controller application-gateway-kubernetes-ingress/ingress-azure \
     --set appgw.name=kestra-application-gateway \
     --set appgw.resourceGroup=<resource-group> \
     --set appgw.subscriptionId=<subscription-uuid> \
     --set appgw.shared=false \
     --set armAuth.type=servicePrincipal \
     --set armAuth.secretJSON=$(az ad sp create-for-rbac --role Contributor --scopes /subscriptions/<subscription-uuid>/resourceGroups/<resource-group> --sdk-auth | base64 -w0) \
     --set rbac.enabled=true \
     --set verbosityLevel=3 \
     --set kubernetes.watchNamespace=default \
     --set aksClusterConfiguration.apiServerAddress=<aks-server-address>
Once the load balancer is deployed, you can access the Kestra UI through the ALB URL.
Next steps
This guide walked you through installing Kestra to Azure AKS with Azure Database for PostgreSQL as the database and Blob Storage as the storage backend.
Reach out via Slack if you encounter any issues or have any questions regarding deploying Kestra to production.
Was this page helpful?